 |
We've built the NPT ported version of this single-vessel electric BIAB system based on Spike's OG kettles for a few years. Due to popular demand, we've added the option to start with the new Spike bottom draining TANK kettle as the base.
This is the only single vessel brewing system on the market designed to both recirculate over the top of the grain as well as actively stir the heated zone of the kettle. We guarantee there is no system out there that maintains as precise a temperature across the entire mash as this one. You're likely thinking "If that was so important, why don't other systems use this design?" Yeah, that's exactly what we're wondering too. To read more about this concept, you can read this article. Furthermore, this system is capable of temperature ramps (step mashing) faster than any 3 vessel system could dream of pulling off, short of steam jacketed commercial systems.
The primary benefit to this version of the build is that the new Spike TANK kettle has a slightly conical bottom with a large bottom drain allowing you to clean in place. "CIP" is the standards in commercial brewing since the kettles are often too large to drag over to a sink for a hose out. Why should commercial brewers have all the fun? While the TANK is available in 10 gallons all the way up to 50 gallons, the 20 gallon size is where CIP starts substantially justifying the increased cost. However, we will offer this build from 10 to 30 gallons sizes because we aim to please.
The primary disadvantage to the TANK version of the system in the noticeably increased cost both due to the base cost of the kettle and more heavy use of Triclamp ports and accessories. ALL six ports of this kettle are TC/Triclamp on this version (no threaded ports).
Standard Features:

|
Spike TANK Brewing Kettle (your choice of size based on your desired batch size.)
- 10 Gallon for low to moderate gravity(up to 8%ABV) 5-6 gallon batches (a full homebrew keg). 3 gallon minimum batch.
- 15 Gallon for 5-6 gallon finished batches with no upper ABV limit. Also capable of low ABV(4%) 10 gallon batches. 4 gallon minimum batch.
- 20 Gallon for 6 to 12 gallon batches with practically no upper ABV limit.
- 30 Gallon for 12 to 17 gallon batches with practically no upper ABV limit.
Note: ABV limits listed above are approximate based on average mash efficiencies of 68-72% and may vary from your experience.
|
The TANK kettle sits on four legs to allow for the bottom drain plumbing to clear your table. The kettle comes with a purpose made 90 degree elbow that clamps on to the center TC port to extend the butterfly valve out towards the front of the kettle. We also include the butterfly valve. Note that the bottom drain is only designed for the cleaning operation and is not used in the brewing process.
 BIAB coarse mesh false bottom BIAB coarse mesh false bottom to hold the bag above the heating element and drain. This will be appropriately sized for the kettle size you choose. This creates an ample liquid-only area for the heating element to heat wort without getting smothered by the bag while also allowing the temperature sensor to pickup up the absolute average temperature. Since the entire bottom of the bag becomes free draining, the grain bed is also less likely to become "channeled". Recirculating wort drains down evenly across the entire mash volume.  Wilser BIAB drawstring bag. Wilser BIAB drawstring bag. These bags are hand made right here in New Jersey. The drawstring makes holding the bag securely to the upper rim of the kettle a breeze. We also include a small loop of paracord to use as a lifting "choker" since you should not use the built in drawstring as a lifting point. The entire staff here have been using Wilser bags since we all converted to BIAB brewing in 2015 and found that the average life span of these bags is 30 batches granted you don't do anything stupid. To keep the bag flowing optimally, soak the bag in a hot PBW solution for 20 minutes and rinse with hot water (every other or every third brew day).  Locking Rope Hoist. Attach this to an overhead eyebolt or other suitable lifting point. Now you can incrementally lift your bag as necessary and it will hang there unassisted. The end with the locking pully is generally at the bottom so you can reach the lock release lever. This requires pushing the rope upward to lift the bag. You can get even more mechanical advantage if you add a second pulley up higher on the hanging rope and loop the loose end of rope over it. That will allow you to pull the rope down to lift the bag. Once you get to the 10 gallon batch size, it really helps.
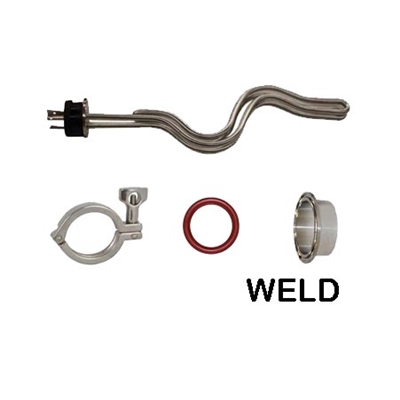
5500 Watt, TC integrated heating element with L6-30P locking male plug, TC clamp and gasket to install in the TC port welded in to the kettle. Note that we install the element TC port on the right, rear side of the kettle (at the 1-2 o'clock position if the front of the kettle is 6 o'clock) though the temp probe port is going to be on the left rear side so you can interchange these locations if you wish. 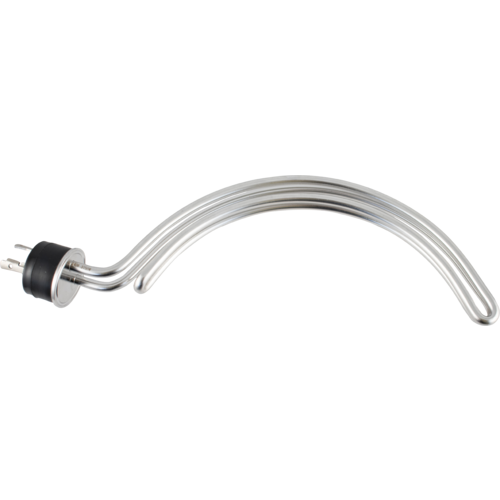 OPTIONAL: OPTIONAL: You can upgrade to the Brew Built SLINGBLADE style element if you would like the center bottom of the kettle to be wide open for dropping an immersion chiller all the way down. The only issue is that the Slingblade is more expensive initially and upon any need to replace. Finally, note that the wattage is lower than our standard ripple elements. To research these elements, you can click here. You can CLICK HERE to drop the upgrade into the cart ($35 additional cost).
  Wort Out Port Wort Out Port- The wort output port, that feeds into the pump is installed as a 1.5" TC port on the lower front left area of the kettle, at approximately the 7 o'clock position. A Blichmann brand linear flow valve is clamped on with the Blichmann Stationary pickup tube sandwiched in between. This is one of the most functional and compact way to integrate a pickup tube into a TC/triclamp port without adding the extra bulk and clamp that other solutions force you into. We finish off the valve assembly with a TC clamp and gasket to attach whichever pump kit you select below.
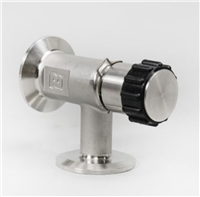  Whirlpool Return Whirlpool Return- This port is also a 1.5" TC located to the right of the Wort Out Port. A Blichmann brand linear flow valve is clamped on with the Blichmann Stationary pickup tube sandwiched in between. We recommend a slight upwards output angle to encourage vertical mixing during the chilling operation to reduce temperature stratification. We finish off the valve assembly with a TC clamp and gasket to attach whichever pump kit you select below.
.jpg) Locline Recirculation Kit Installed through the lid of the kettle via TC port. This solution is decidedly better than draping a silicone hose on the grain bed because it is articulating and holds its position exactly where you position it. You can orient the outflow exactly at the height of the top of the grain bed to reduce boring holes in the grain bed. It is also superior to lid mounted sprayers that cannot be height adjusted because spraying or dripping wort from several inches above the grain bed causes more heat loss and oxidizes the malt more than necessary. Just like the drain and whirlpool ports, the connection to the hoses is done via quick disconnect. The TC port in the lid may also be used for installation of a CIP cleaning ball. We recommend using the Spike branded CIP ball because it spins with the least amount of pump pressure we've seen. Note that you can pop the black locline segments off of the QD x TC adapter and repurpose that as the input to the spray ball if you wish to avoid buying an extra adapter. You will need an extra TC clamps and gasket however. Locline Recirculation Kit Installed through the lid of the kettle via TC port. This solution is decidedly better than draping a silicone hose on the grain bed because it is articulating and holds its position exactly where you position it. You can orient the outflow exactly at the height of the top of the grain bed to reduce boring holes in the grain bed. It is also superior to lid mounted sprayers that cannot be height adjusted because spraying or dripping wort from several inches above the grain bed causes more heat loss and oxidizes the malt more than necessary. Just like the drain and whirlpool ports, the connection to the hoses is done via quick disconnect. The TC port in the lid may also be used for installation of a CIP cleaning ball. We recommend using the Spike branded CIP ball because it spins with the least amount of pump pressure we've seen. Note that you can pop the black locline segments off of the QD x TC adapter and repurpose that as the input to the spray ball if you wish to avoid buying an extra adapter. You will need an extra TC clamps and gasket however.
 Dual Path Recirculation Dual Path Recirculation. This "split flow" is the key to the different modes of kettle operation so we'll explain this in some detail. With the manipulation of two valves, you will select whether recirculated wort goes into the whirlpool port, goes up and over the grain bed or both. The individual valves for each wort path also allow you to customize the flow rate to each destination. Whirlpool is used during initial water heat up as well as during immersion chilling. In the "both" position with both valves open to some degree, wort is recirculated over the grain to distribute new heat input as well as whirlpooled to keep the lower layer fully mixed and at the same temperature during the mashing phase. This recirculate and stir combination feature is not found on any competitor systems and is the real key to perfect temperature. This cannot be emphasized enough. Many users of recirculating BIAB systems complain about temperature stability issues along with pumping too quickly over the top and possibly dry firing their element. This dual flow path system is the solution to both problems. We recommend limiting the recirculation flow rate to 2 quarts per minute or less to avoid dry firing the element. Finally, the recirculate only mode is great for filling your fermenter. Instead of this hose going up to the lid mounted locline port, it gets quick disconnected from the lid and dropped into or connected to your fermenter. To read more about this concept, we have an article here.
CHOICES YOU HAVE TO MAKE OUTSIDE OF ORDERING THE BASE KIT ABOVE
Everything listed above represents the common "base" kit that all share the same components regardless of any of the following add ons you select. The price listed is for the base build by kettle size. The cost of the pump kit add on is the same regardless of which kettle size you select.
We have three pump kits available for use with the Get Tanked eBIAB system:
1. Native TC - This kit starts with the Blichmann Riptide TC ported pump. The output of the pump is split two ways with a TC based "tee". The three included hose sets terminate onto TC x hose barb adapters. The hoses get connected to the kettle ports and pump ports "natively" with clamped TC connections except for the hose connection to the lid recirculation port which is setup with a female quick disconnect. This is the only junction that will be disconnected during a brew day so it makes sense. If you plan to use this hose to fill your conical fermenter, it's a good idea to have a TC x MQD adapter on the fermenter to snap this hose on. This pump kit option is the least bulky and most economical way to preserve fully sanitary connectivity. $455
 
To add this version of the pump kit with the BLICHMANN RIPTIDE PUMP into the shopping cart, CLICK HERE.
If you would prefer the same kit with the SPIKE FLOW PUMP in place of the Riptide, CLICK HERE.
2. TC + QD - This kit also includes the Blichmann TC Riptide. The difference in this kit is that all TC ports that get hose connections are first converted to male QDs with adapters. Then the three included hose sets are equipped with high flow female QDs. This option is more expensive due to the extra parts but is offered for those who desire quick disconnections without having to master TC clamp manipulations. $545
 
To add this version of the pump kit with the BLICHMANN RIPTIDE PUMP into the shopping cart, CLICK HERE.
If you would prefer the same kit with the SPIKE FLOW PUMP in place of the Riptide, CLICK HERE.
3. Threaded NPT + QD - This is the most economical of the three options. It starts with the NPT threaded version of the Riptide Pump as well as NPT threaded versions of the splitting TEE, Ball valve and male QDs. The three kettle TC ports that get hose connections are converted from TC to Male QD with adapters. The three hose sets have high flow female QDs. $420
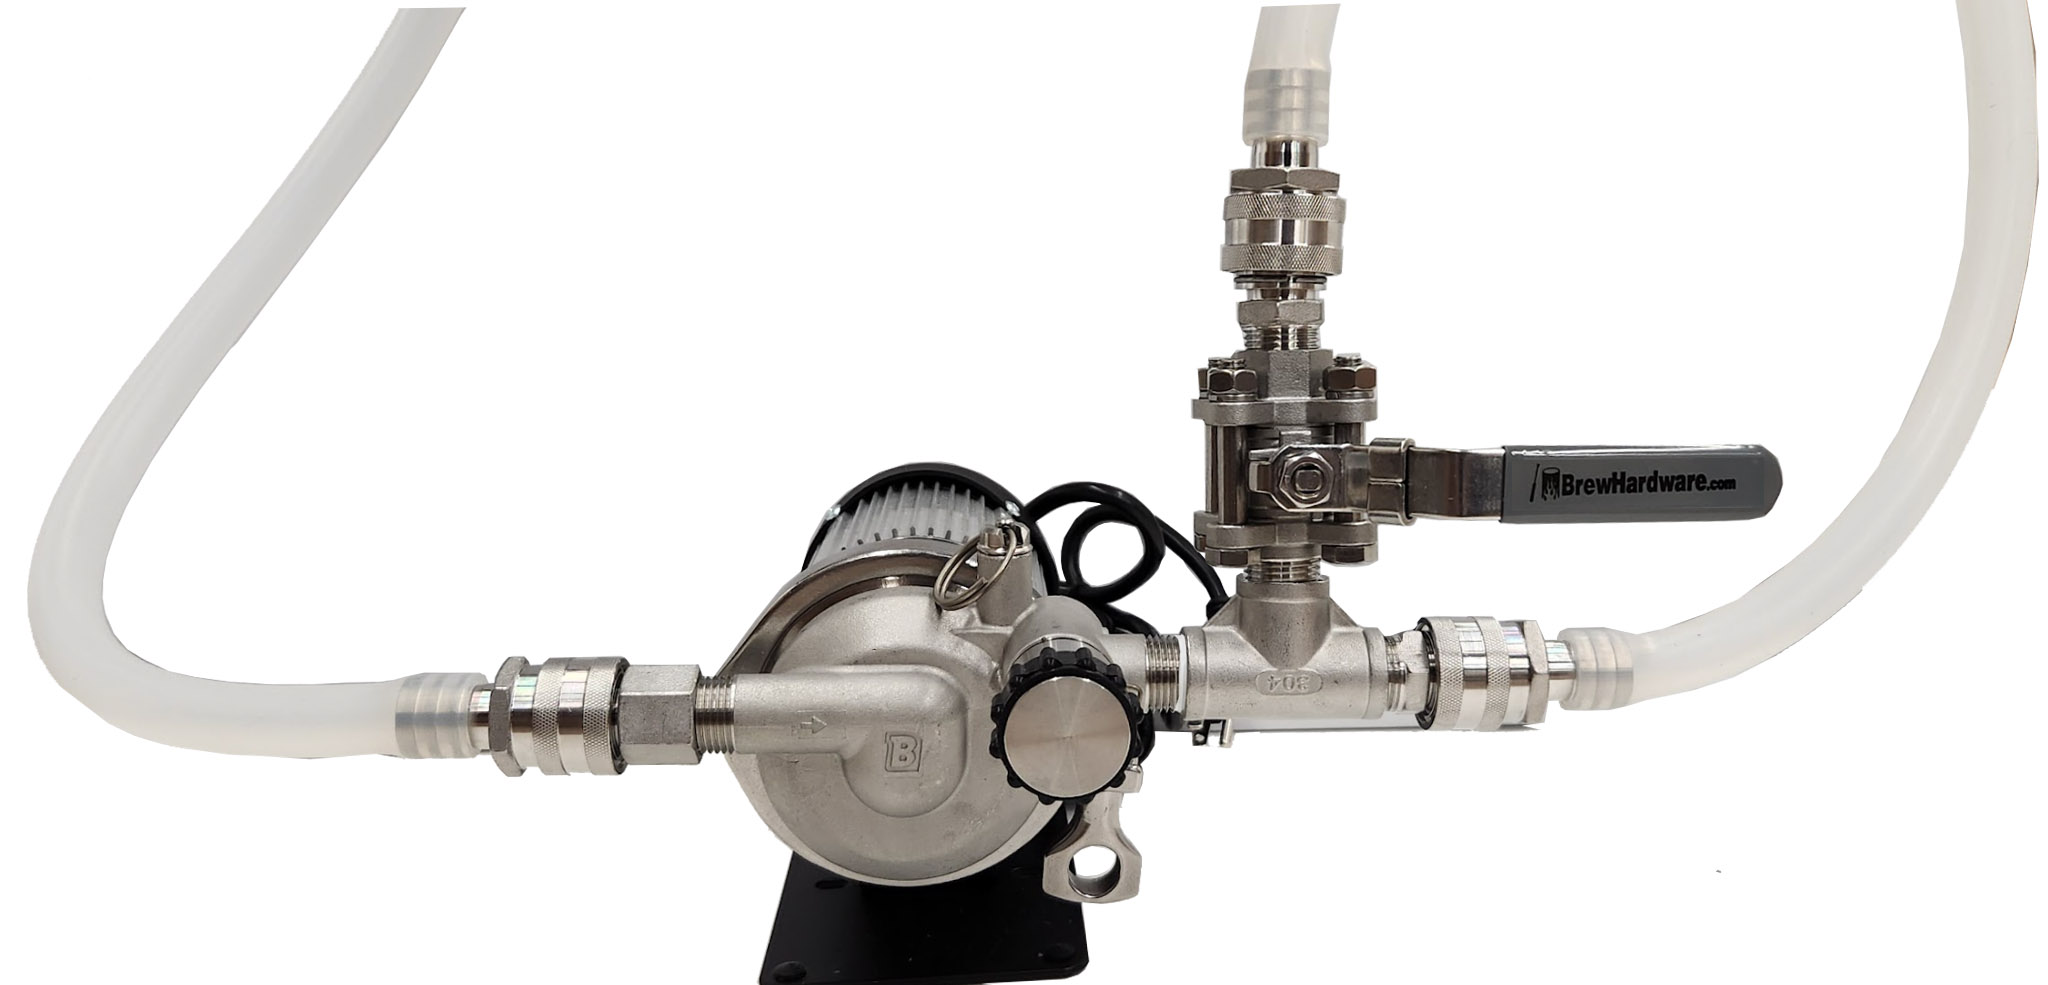  To add this version of the pump kit with the BLICHMANN RIPTIDE PUMP into the shopping cart, CLICK HERE.
Temperature Controller (You will add as a separate cart item if you do not already have a controller)
We stock two controllers for your consideration; The Blichmann Brew Commander and the Auber Cube 3e. The Brew Commander has been sporadically available so if you're unable to add it to the cart, it's because they are fully unavailable. The Cube is always available. You can read about each of the controllers on their respective product pages linked above but we've also created a buyer's guide to help compare the features. 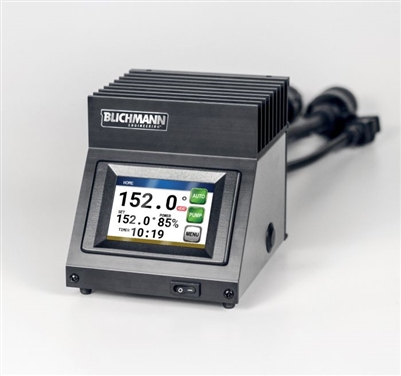 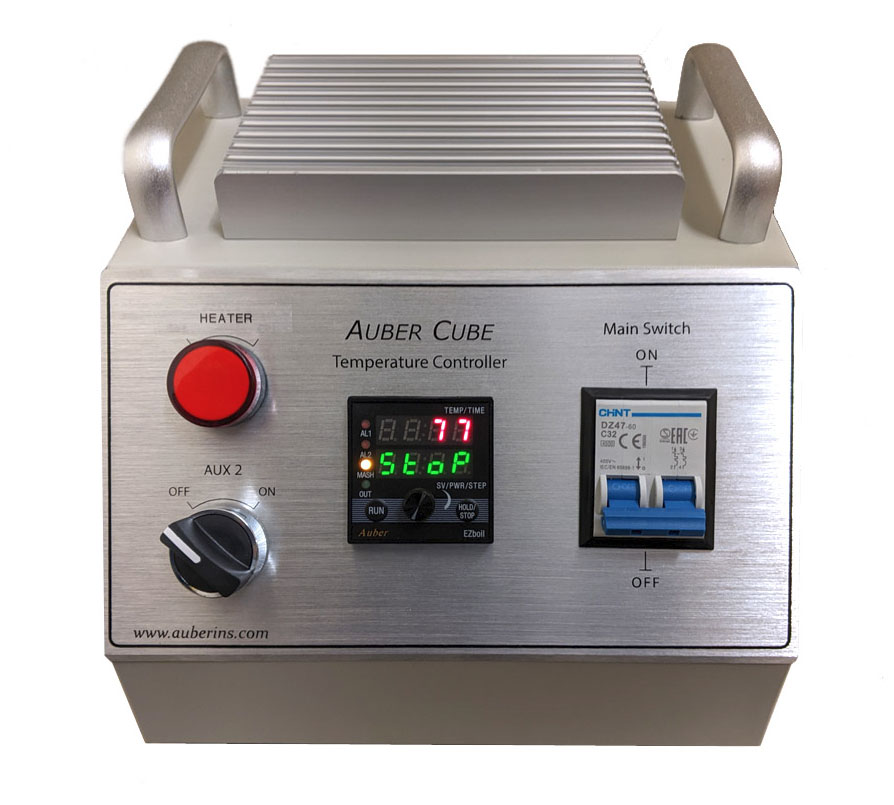 Be sure to visit the respective product pages to add one of the controller's to your cart. IMPORTANT- Remember that the Get Tanked version of this system uses a 1.5" TC port for the temperature probe. If you select the Blichmann Brew Commander, be sure to include the TC adapter accessory found on the Brew Commander product page. Similarly, if you select the Auber Cube, select the "TC probe" option and enter #14 in the specific probe type *Not Included*
Steam Control
If this is your first venture into electric powered brewing, you're probably psyched about the prospect of brewing indoors, maybe in a garage or a dedicated brew room in your basement. Don't be caught off guard by the amount of steam that builds up in enclosed places when you boil for an hour or more. If you set up near a window, you can do a reasonable job of venting with a small fan blowing out. If you want to keep the brew day as silent as possible and keep your heated/air conditioned air inside, read all about the the Steam Slayer product on its dedicated product page. One nice thing about the "Get Tanked" version of the system is that the mash recirculation port is located in the lid and this port can be repurposed for the steam slayer after the mash is completed. You would simply need to add the steam slayer unit itself to the cart, a TC 90 degree elbow, and an extra TC clamp and gasket. ChillerWe do not include a standard chiller because the "best" type of chiller is so highly debated.
With the endless system options out there, what sets this one apart? That is a completely reasonable question and we're going to spend a good portion of time explaining why the whole staff chose this configuration and why some of the more popular systems fall short (for us).You can use this information to make an informed decision for your own system. There are a few different aspects to compare and contrast so we'll break it down by topic rather than brand specifics. Bag vs Basket
We chose a food grade mesh bag for our system, in contrast to systems that use a rigid stainless steel basket (sometimes called a malt pipe). For one thing, it reduces the overall system cost. There are some low cost systems that use a rigid basket but they are flimsy and generally only drain at the bottom. The premium basket systems have a substantial price increase and is frankly no easier to use than a bag. The flexible bags tend to drain wort more completely due to the teardrop shape that forms due to the grain weight. It also allows for more wort extraction with a gentle squeeze with a gloved set of hands.
The last, and perhaps the most important thing to consider with basket designs is if they allow an undesirable amount of grain particles to pass through and into the boil kettle. Unfortunately some designs use the same hole/slot pattern on baskets that you would regularly find on a mash tun false bottom. False bottoms could get away with letting grain through since a recirculation in a dedicated mash tun would clean that up and allow clear wort into the boiler. In a BIAB system, any grain that gets through is now in your boil for good.
But doesn't the basket keep the grain off the heating element? Yes, but we've custom designed a coarse mesh false bottom to keep the bag from touching the element and to form an adequate liquid-only area to receive and disperse heat from the element.
Contrasted to All In One "URN" style systems
Proprietary vs modularity: One of the biggest downsides to the full system, small foot print coffee urn style systems is the proprietary nature of all the components. The heating element has to be sourced from the manufacturer if it burns out. If that model or brand is discontinued and the parts market dries up, you will have to discard the entire system. A similar issue exists with some systems that have built in temperature controllers and recirculating pumps.
On the other hand, we use standard modular components that have existed in the market for long enough to ensure long life, serviceability and if all else fails, a suitable open market substitute can be purchased at any time. For example, install industry widely accepted heating elements using the Triclamp standard. You are never stuck buying elements from any one vendor. The same can be said for the pump and whatever controller you use.
Power/Time Investment: Most all in ones are painfully under powered. While they get the job done eventually, the ramp times for heat water initially as well as ramping the wort up to a boil are quite long. Even the systems that offer 240 volt input options still use lower wattage elements than we prefer. We put a hefty 5500 watt element in our systems. For comparison's sake we can take 6 gallons of strike water up to 160F in 15 minutes while the same would take 55 minutes on a 1600 watt URN system. That's a 40 minute difference just for the water heat up step. In almost all cases, you're never waiting for something to heat up with this system. It's usually hot already and waiting for you.
Batch Size Scaling and Future Upgrades
This is a similar contrast as the topic of modularity, but specific to batch sizes. When you buy an URN system, you are buying something cable of typically one batch size and that's it. There is no upgrade path without buying a whole new system. On a modular system like ours, the only thing you need to change to upgrade your maximum batch size is the kettle, false bottom and bag.You'll use the same heating element, pump, controller and accessories. The kettle is the cheapest part of the whole system.
What is Brew In A Bag? This all grain brewing method is purported to have been born in Australia based on minimalist pragmatism. The rest of the world started catching on and most of the big manufacturers have finally released their versions of this simple type of system. This process involves mashing your grains directly in your slightly oversized boil kettle. Grain is contained within a large, fine mesh food grade bag and the spent grain is removed from the wort by pulling the bag out. The concept of sparging (rinsing extra sugars off the grain) is not impossible with this process, but the vast majority of BIAB brewers run a full volume, no sparge mash which means the removal of the grain leaves the desired pre-boil volume. The method makes perfectly good, award winning beers and the brew day is simple and the gear is easy to clean up. NOTE: These systems are not offered with free shipping as the box size and total weight costs a lot to ship and we didn't want to make it unfair for local and nearby customers to try wrapping the average shipping cost into the package. The compromise we did make was to rate the shipping weight much lower than actual so you'll pay a little less than half the shipping cost and we pay the rest.
Operating Recommendations.
If this is your first time using the system, wash the interior of the kettle walls and bottom with dish detergent and rinse thoroughly. Fill the kettle with a few gallons of water and a scoop of brewing detergent such as PBW. Heat to 150F and recirculate through the pump and plumbing systems for 30 minutes. Ball valves should be kept in the half-open position and temp held at 150. Empty the kettle and refill the kettle with hot tap water (about 2 gallons and rinse it through the plumbing system with the pump on again. Rinse the kettle one final time.
On brew day, fill the kettle to your recipe’s recommended level. For a full volume mash, which this system is designed to use, this will be somewhere between 8 and 9 gallons for getting about 5.5 gallons into the fermenter. For an 11 gallon batch size, the starting water would be closer to 14-15 gallons. Note: If you have the Topsflo pump directly connected to the kettle drain, make sure the short hose is connected to the flow manifold on the whirlpool port and both ball valves are closed before filling. Prime the pump.This involves letting water flow from the kettle into the pump without too much resistance on the pump output. Make sure you have the narrow recirculation hose connected to the right side of the flow manifold and drop the other end of the hose into a bucket on the floor. Open up the valve that feeds into that hose until you see water flowing. You can turn the pump on briefly to verify that it is primed, which will be evident by an immediate increase in water flow. Quickly shut the right hand valve to stop water from going into the bucket and then open the larger valve leading to the whirlpool port. Set your controller to start heating with your recipe’s “strike water” temperature. This is recipe dependent, but on this system it is typically about 6-8F above your desired mash step temperature to deal with the cooling effect of the grain. Leave the pump running into the whirlpool at full open for the heat up process. Add any brewing salts or acid additions necessary. Dough In: Once you reach strike temperature, Turn off the pump. Reset your controller’s target temperature to the recipe’s first mash rest temperature (typically 150-155F). Drop in your bag and secure to the rim of the kettle. Stir the grain in gently and make sure there are no dry dough balls. Set the Locline (the black plastic segmented tubing on the underside of the lid) to a position where outflowing liquid will be delivered gently onto the top of the mash. It should exit horizontally so as not to bore down through the grain. The flow should also generate a gentle stirring of the top liquid. When the lid is placed on the kettle, the outflow should not be under the liquid level nor too high but just get it close. Hook up the narrow recirculation hose to the QD on top of the lid. Set whirlpool and recirculation flow rates. The whirlpool valve should remain full open for the entire mash. Turn the pump back on. Lift the lid enough to be able to see the opening of the Locline and slowly open the recirculation valve until the wort trickling out forms a diameter of approximately ⅜”. If you want to be more exact and get acclimated to what the correct flow looks like, collect the flow into a measuring cup and set the valve so that you fill to 1 cup in 10 to 15 seconds. If it’s less than 10 seconds, the flow rate is too high and you may run the wort into the bag faster than it can run through and you may damage your element. If it’s slower than 15 seconds, you may have trouble with lower mash temps at the very top of the mash. Once you are happy with the flow rate, put the lid back on the kettle. You will quickly learn visually what the proper flow rate is after a couple batches of measuring/timing. Run through your mash program as dictated by your recipe. The vast majority of recipes call for a single rest temperatures. While many recipes call for a “mash out” at 168F for 10 minutes at the end of the mash, we usually raise the temp target 10F above the rest temp and hold it there for 10-15 minutes. This ensures a complete conversion and the best extraction efficiency. Removing the grain bag: Temporarily turn off the heat and shut the pump off. Lift the lid up to stretch the recirculation hose to full vertical position so that some wort drains back into the manifold and shut the recirculation valve off completely. Disconnect the hose from the lid and dangle into a bucket. Pull your locking pulley down closer to the kettle. Cinch up the drawstring on the bag and wrap a loop of paracord around the top few inches of the bag and loop one end through the other (creating a choker). Hang the free loop on the pulley hook and take the slack out of the rope. Lift the bag up with the pulley slowly about 2 inches at a time, allowing about 1 minute of draining each time until the bag is no longer touching the wort in the kettle. Leave it in that position to drain. Fire up to Boil: Ensure that ONLY the whirlpool valve is fully open and turn the pump on. Running the pump at this stage is important to flush any fine particles off the surface of the element to prevent scorching. Set your controller to boil mode and enable the element. Continue running the pump through the whirlpool until you reach 180 to 190F and then shut the pump off. We do not recommend running the pump all the way up to a boil or for an extended time at boiling temps. At about the same time you shut the pump off, you may want to put some rubber gloves on and give the bag a final squeeze before you remove the bag from the hoist and temporarily put it in a bucket until you discard the grain. Be extremely careful not to drop the bag into the kettle as it will cause burns from splashing hot wort. It is a bit safer to lift the bag high enough to temporarily put the kettle lid back on to prevent this from happening. You will have to rinse off some drips from the top of the lid, but it’s safer. Reaching boil. As you reach a boil, adjust the boil intensity you prefer and begin your hopping schedule. If you are using a steam condenser (SteamSlayer), you will be keeping the lid on and turning on your Steam Slayer water supply. Read the instructions for that product elsewhere. If you are not using a steam condenser, keep the lid off for the boil. End of Boil Chilling. Ensure the heat is turned off/disable element. If using the steam slayer, turn off the water source. If you’re using an immersion chiller, drop that in but leave the water off for a minute. Dangle the recirculation hose over the top of the kettle and into the wort, turn the pump on and crack open the recirculation valve to put some hot wort through the hose to heat sanitize for about 2 minutes. Shut that valve and leave the pump running through the whirlpool. Turn on your cooling water. If the recipe calls for a hop stand or whirlpool hop addition, shut your cooling water off when you reach that target temperature and add the whirlpool hops. Resume chilling. If you want the cleanest possible wort going into your fermenter, chill down to your desired temperature, remove the chiller and continue whirlpooling for 2 more minutes. Shut the pump off, put the kettle lid on and leave the kettle to settle out for at least 30 minutes or up to 2 hours. Then drop your recirc hose into your fermenter and open the valve. If you do not need the pump to move the wort, just let it drain under gravity slowly and you will see how clear the wort is. If you’re using an external chiller such as a tube in tube counterflow, hook up the recirculation hose to the input of the chiller. You will need a second hose to go from the exit of your chiller into your fermenter. However, before it gets routed to the fermenter, you’ll want to loop that hose back over the kettle and send some boiling wort through the chiller and hose for 3 minutes to heat sanitize. Turn cooling water on until the wort exiting the chiller is as cold as you want. You may have to slow the flow down to make it work. Send the wort into the fermenter.
Post brew cleanup: Dump/hose out the bulk of the trub in the kettle then repeat 1b above. While the PBW solution is circulating, use a sponge to loosen up any sticky hop residue on the upper sidewalls of the kettle. After rinsing everything well, store the kettle with both valves in the half open position to allow all spaces to dry.
|
|
 |